
I began making the hand in 3ds max and created a ‘base mesh’ using a ‘box’, which I sectioned into four so that I could extrude fingers from it as shown in the snapshot.

Next I ‘extruded’ the fingers separately, so that they kept their box form. I did it in three sections so that there was 3 finger links. This is important when it comes to ‘rigging’ the hand I then bevelled the end of the finger tips to round them off slightly.

I then ‘extruded’ and shaped a forearm. I need the fore arm as I discovered sign language uses the forearm to communicate as well as the hands
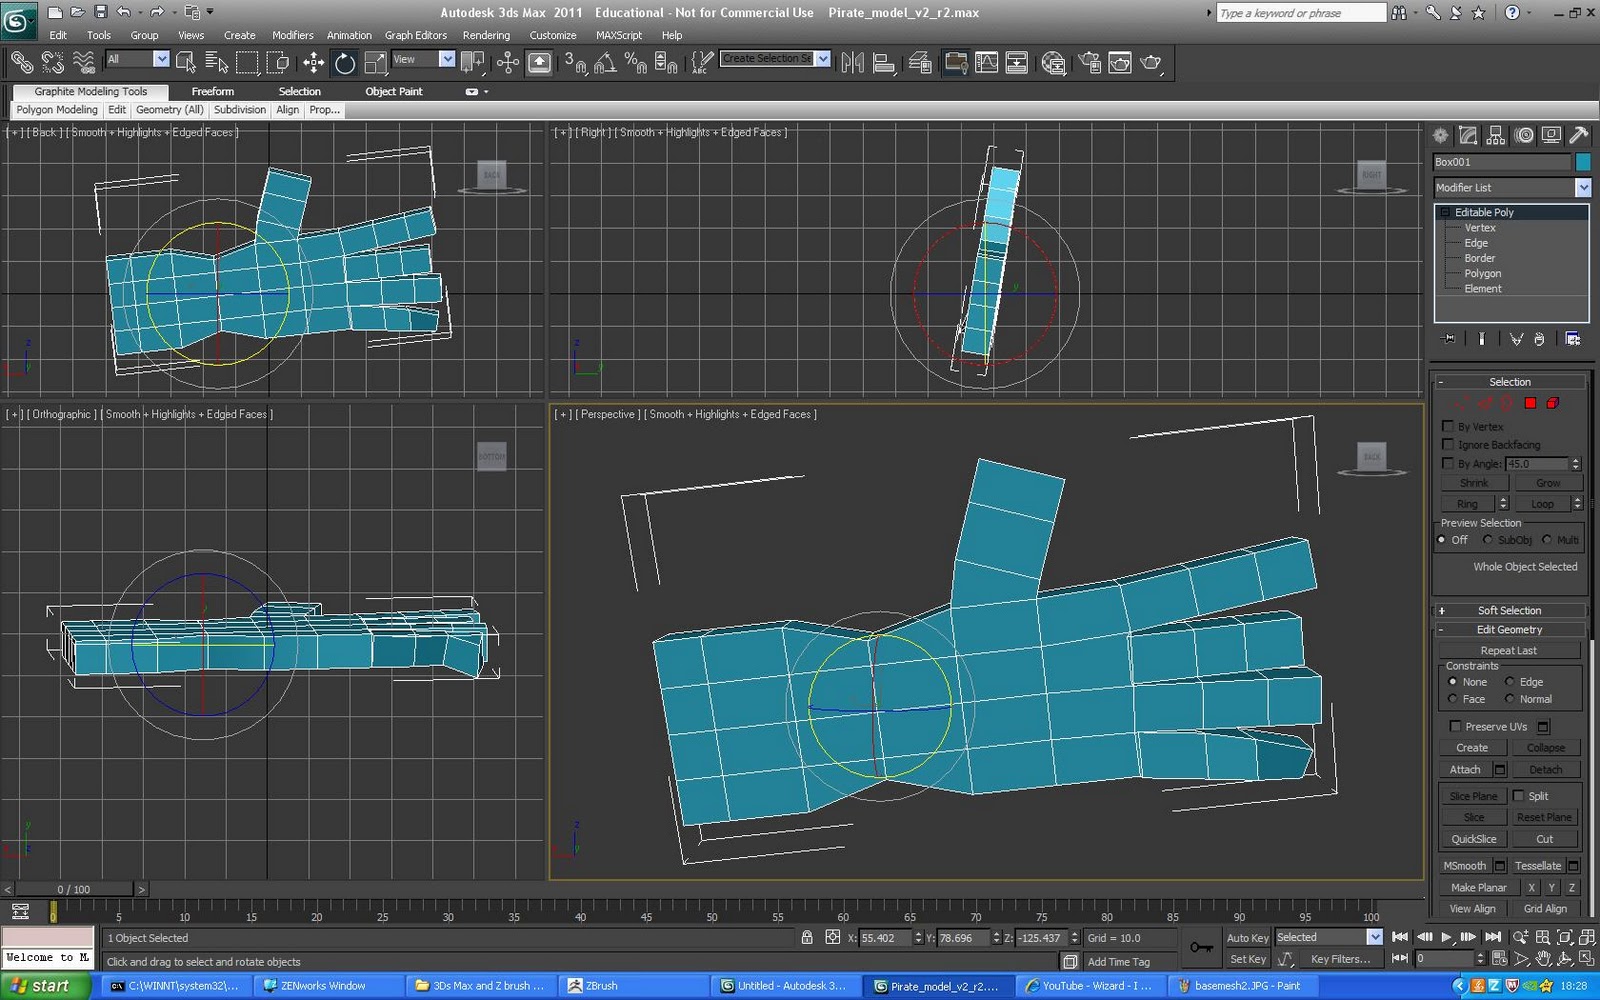
Finally in 3ds max I moved around the edges of the mesh to make the hand shape more accurate. I found it to be a very successful ‘base mesh’. I then exported the mesh as an object (.obj) file.

ZBrush
I imported the .obj file into Zbrush. It is in this programme that the vast majority of my detailed sculpting happened. I referenced my own hand from images however as it was for children I decided to keep an element of cartoon to it, so I kept it rounded.


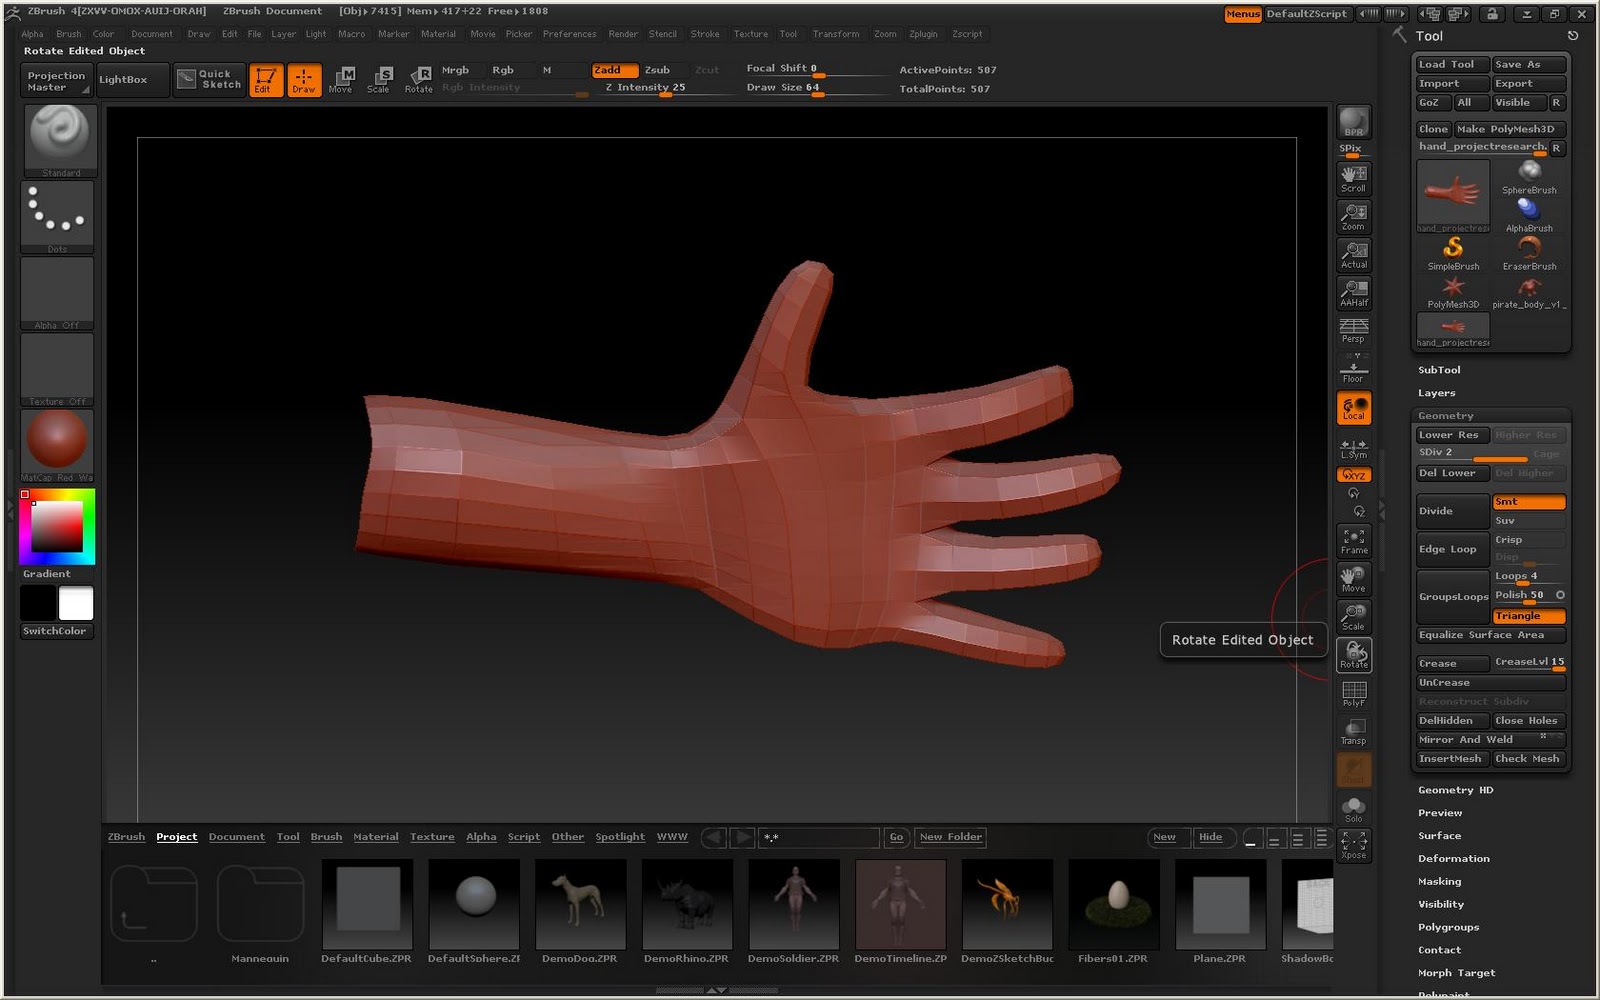
My first action was to ‘divide’ the mesh into more ‘polygons’ so that it is easier to work with. From there it was a case of using the ‘move’ and ‘clay’ tool to shape the hand. Whilst sculpting the hand I took into consideration the shape of the thumb to the palm, the finger joint creases and the positioning of the knuckles. The knuckles and creases are important to get right as it makes all the difference when it comes to rigging the hand.


This was my first time using Zbrush and I feel it was successful. I kept the poly-count reasonably low as I didn’t want too much going on when rigging the hand however did want to keep the impression of stretching skin over joints.
No comments:
Post a Comment